Tutorial: Minimap in PICO-8
In this tutorial I will show a simple way to generate a minimap for your PICO-8 game. As an example we will add a minimap to the Jelpi demo.

I used a very similar method to draw the thumbnails in the Lazy Farm menu:

As you probably have noticed, the level selection screen was inspired by the menus in Yoshi's Island.
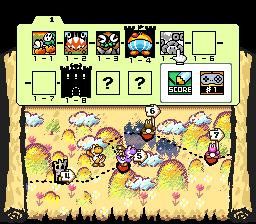
I didn't have the capacity to create unique image for each level so in order to differentiate each of the levels in Lazy Farm I decided to show them in a reduced size in the level selection menu. Of course, these minimaps are generated on the fly because I don't want to redo them every time I update a level.
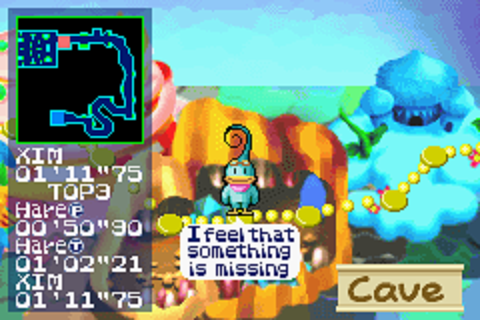
Many games use minimaps to provide information at a glance during the game. The most common examples are the minimaps in the strategy games. The Gameboy Advance game Kurukuru Kururin shows a minimap with a sneak peak of the level you have selected in the world map:
How it works
The method is simple: we are going to assign a color to each tile in a table. When drawing the minimap we will traverse the map tiles one by one, putting a pixel of the color instead of the tile itself.
This is a partial list of the tile to color mapping in Lazy Farm:
tile_colors = {
 default = 4,
 [TL_COW] = 5,
 [TL_PIG] = 14,
 ...
 [TL_DOOR] = 6,
 [TL_ICE] = 12,
 ...
}
I have manually selected a color for each. If a tile does not have a color assigned it will be shown as brown (4).
Drawing the minimap depends on the game but probably it will look like:
for i = 0, 15 do
 for j = 0, 15 do
  local t = mget(j, i)
  local c = tile.colors.default
  local tc = tile_colors[t]
  if tc != nil then
   c = tc
  end
  pset(j, i, c)
 end
end
Just add your code at the end of the _draw() function to make sure the minimap is shown on top of everything else.
Minimap for Jelpi
Let's modify the Jelpi, the platformer demo that comes with Pico8 to show a minimap.
Similar to the mapping for Lazy Farm. I have created a map from the Jelpi tile id to colors. I only added the tiles that want to be shown in the minimap. Tiles that are part of the background won't be shown.
For example, the tile 6 (the breakable blow) I will use the color 14 (pink) because it is the predominant color in the tile.
This is my full table:
tile_mapping = {}
tm = tile_mapping
tm[2] = 4
tm[3] = 4
tm[6] = 14
tm[7] = 13
tm[8] = 13
tm[9] = 13
tm[32] = 4
tm[33] = 4
tm[34] = 4
tm[35] = 4
tm[36] = 4
The function we are going to draw takes 4 arguments. (x, y) is the top left position where we are going to start drawing the minimap. (ox, oy) is the position of the game map we are going to display.
function draw_minimap(x, y, ox, oy)
I'm adding the the call to this function as the last line of the _draw() function. We will draw the minimap starting from the position (1, 1) of the screen and only display the tiles around the position of the player. In Jelpi the variables cam_x and cam_y mark the position of the game camera so we pass them as arguments:
draw_minimap(1, 1, cam_x/8, cam_y/8)
And the implementation:
function draw_minimap(x, y, ox, oy)
 local rows = 16
 local cols = 48
 local default = 0
 rectfill(x, y, x+cols, y+rows, 0)
 for r = 0, rows do
  for c = 0, cols do
   local tl = mget(ox + c, oy + r)
   local cl = tile_mapping[tl] or default
   pset(x + c, y + r, cl)
  end
 end
end
Displaying the actors
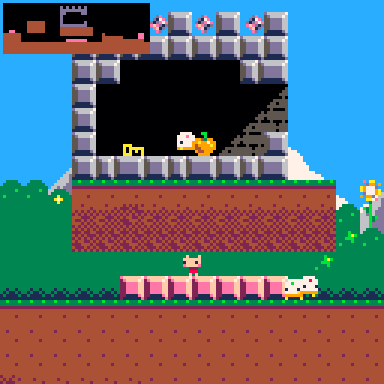
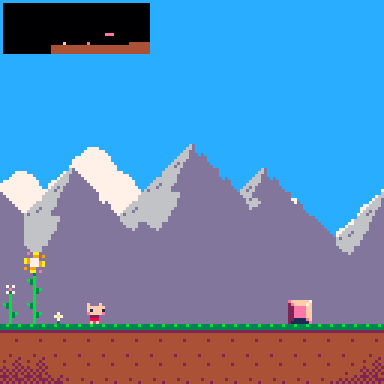
The code above only draws tiles that are on the map memory but in Jelpi we also have a table of actors that it would be nice to show in the minimap. In the image below you can see how it looks in the game. It does show the structure of the level but there is no indication about were the player or the enemies are.
Each actor in Jelpi has an attribute called kind. It represents which type of entity it is (1 for the player, 2 for enemies, etc). We could have a mapping from kind type to color as we did for the tiles but I'm going to do it a bit differently this time: I'm going to add an attribute called color to each actor that will represent the minimap color.
For this, below to each call to make_actor() I have added my new attribute. For example for the player creation:
function make_player(x, y, d)
 pl = make_actor(1, x, y, d)
 pl.color = 15 -- I added this line
 ...
 return pl
end
I added similar lines after creating the enemies and the items.
And the we update our draw_minimap function. I've added the following loop to put a pixel of the color of the actor:
for a in all(actor) do
  local ax = flr(a.x) - flr(ox)
  local ay = flr(a.y) - oy
  pset(x + ax, y + ay, a.color)
 end
The sprite positions in Jelpi are not integers so I had to put use flr() to draw the actos in the correct place. This was done mostly by trial-and-error.
This is the full method:
function draw_minimap(x, y, ox, oy)
 local rows = 16
 local cols = 48
 local default = 0
 rectfill(x, y, x+cols, y+rows, 0)
 for r = 0, rows do
  for c = 0, cols do
   local tl = mget(ox + c, oy + r)
   local cl = tile_mapping[tl] or default
   pset(x + c, y + r, cl)
  end
 end
 for a in all(actor) do
  local ax = flr(a.x) - flr(ox)
  local ay = flr(a.y) - oy
  pset(x + ax, y + ay, a.color)
 end
end
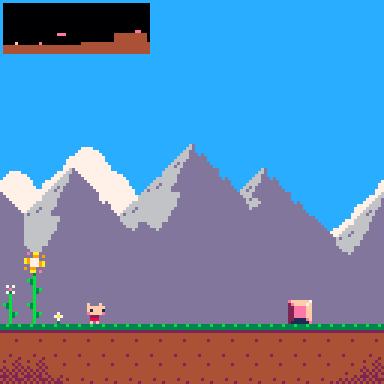
The result is a minimap that shows entities and tiles in real time.
Final touches
You may have noticed that the minimap tries to display areas outside of the map on the edges of the level. We are going to address this issue in this section.
In the minimap we are displaying the same area that is shown on screen plus 16 tiles on each side. Thus, at the start of the level we see a huge empty area on the left.
The solution is to leverage mid() when passing the arguments to our draw_minimap function(). mid(lo, value, hi) is used to prevent that value goes outsize of the range [lo, hi]. We just add the boundaries of the level so we enforce that the minimap never goes outside:
 local pos_x = mid(0, cam_x/8 - 16, 127 - 48)
 draw_minimap(1, 1, pos_x, cam_y/8)
Now the minimap is displayed correctly on the left of the level.
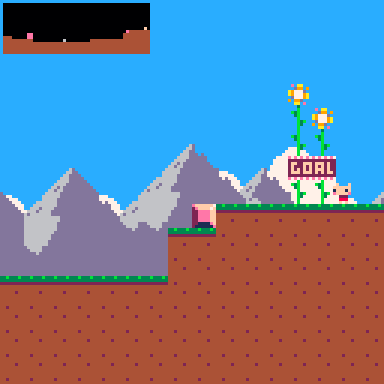
And also on the right.
Color selection
If you have many tiles you might be thinking about selecting the color automatically from the tile itself. I tried to select the color that was used the most on each tile but I didn't like the result. For example, sometimes you may want to use different shades of green in the minimap for grass and trees but picking the color by majority may show both tiles with the same color.
Farewell
I hope you found useful this tutorial. Please let me know your feedback in the comments section.
Leave a comment
Log in with itch.io to leave a comment.